Let's start!
^^

This is the original image which i have added the mmu logo and mmu font

1. I'm selecting the MMU words with "Magic Wand"

2. I have to rasterize it before i start to do on the other step.
I click "Layer" > "Rasterize" > "Layer"
I click "Layer" > "Rasterize" > "Layer"
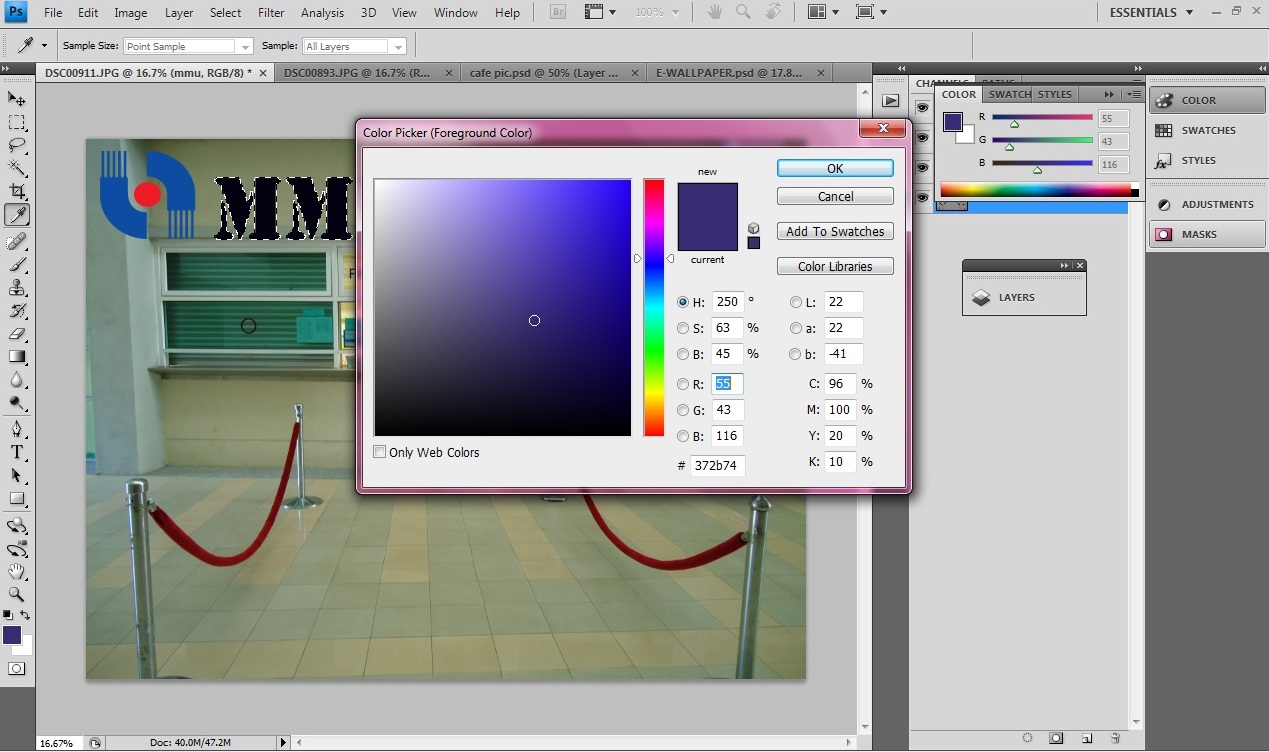
3. Then I choose the colour that i want
I clicked the "colour picker"

4. I clicked the " Gradient Tool " to make my word became nicer
because I don't want the whole word is blue in colour.
I clicked it from down to top over the "MMU" word.

5. I move the chair that i've been selected in

6. After that, I felt my background was so simple. Thus, I wanna change the pattern of the original background.
I double clicked the background layer( came our layer style box ) > i tick on "beveal and emboss" & "texture" > ok button!
I double clicked the background layer( came our layer style box ) > i tick on "beveal and emboss" & "texture" > ok button!

7. I repeated in the same step as above. For MMU word I've chosen "Drop Shadow", "Outer Glow" , "Inner Glow" , "bevel and emboss" and "stroke"

8. I repeated the same step again on the MMU LOGO.

9. Now, I move the "love" that i've been selected from the other file in.


10. I want to have the same love without doing double working.
I clicked under the "love" layer > duplicate layer
Then, I move it out from there.

11. Then I edited the alphabets in some of each of the small love layer.

12. I also edited the "FOM OPEN DAY" words in too by using "Horizontal Type Tool"


13. Lastly, I move in three photo which I've selected by selection tool.
And then I've repeated the same step (6) again with different "Blending option: Custom"
And some of the pictures I've set it transparent by changing the % of the "opacity" which is also inside the "layer style" box.

This is the result.
Thank you!
^_^
No comments:
Post a Comment