Now I would like to continue editing my E-wallpaper
^^
I would like to further editing my E-wallpaper by
using the retouching skill and enhancing digital photograph
that I had learnt last week
^_^
this is the picture that i had edited in the previous post
now I would like to continue it
1. i) I've applied "Ocean Ripple".
To find the "Ocean Ripple", at the top search for Filter > Distort > Ocean Ripple
![](https://blogger.googleusercontent.com/img/b/R29vZ2xl/AVvXsEhVz_joe2LxZm7ehiFPdg4ZfxyTgy-Vs87gfCLIw8uHvPJ7csff7C6lD48kotrnBoIGZ60ZKf8nX1tCn6MaAav4P9Qv4hhioSgDmjYNsUYvNnHTOGvk0a6zuwTeKgxaFsz7mis2YU7ueCSW/s320/2-DRY+BRUSH.jpg)
ii) I've applied "Dry Brush".
To find the "Dry Brush", at the top search for Filter > Artistic > Dry Brush.
![](https://blogger.googleusercontent.com/img/b/R29vZ2xl/AVvXsEhMQhPQZYEUzkNLK7jr7Rw2-vVHlh1G1Q1GpxRwDPmkx4ABujZ7I5Hb1xZ7H-NSIY2G30p8IdnM56m-r-e4cawW7vdXFY0ZWDAANx-pLEq73Q0Pw2XKU6pO2uKUWba1KU5zL1Ot-Iw4BLCm/s320/3-ADD+NOISE.jpg)
![](https://blogger.googleusercontent.com/img/b/R29vZ2xl/AVvXsEhJaFhyphenhyphenuBnpkNG8qXOx9ywLX89aBhyUYOvmFSa8WS0g0duW4Z2ZrrwhjkAXFbh8gAZlq4Wvzj5oMD72tT4tfbZmbFw3mfk_e4B0SB3pAlSDHThjuI00ptc6XqhjGkIUvIKhFnbP41CBwYnm/s320/3-ADD+NOISE%25282%2529.jpg)
iii) I've applied "Noise" too.
go to Filter > Noise > Add Noise
I've changed the content in "add noise" box as shown in picture above
which is on the right side.
I had applied all those effects on this 3 layers which is "FOM","OPEN" and "DAY" layers.
![](https://blogger.googleusercontent.com/img/b/R29vZ2xl/AVvXsEjDHdh-0r7bI4XqvoVN7VbgzRComw_1J6u7LRTARoJ8sEmCqPQg7I9YDryWDCGIFN0k2IFe48KFHYelaL-3AnQoYEau8oDcDnK_BW1y4NZyjCKCpjcZER_PnuGLzkmtie0MGwnRlh9_6rtr/s320/4-FILM+GRAIN%25282%2529.jpg)
2. Then, I've applied the " Film Grain " effect on my background layer.
To search for "Film Grain" , go to "Filter" > "Artistic" > "Film Grain"
as shown above.
3. After that, I've applied "Lighting Effects" on the chair layer to make the chair looks brighter and nicer.
Filter > Render > Lighting Effects
I also have adjusted it until I've satisfy.
Filter > Render > Lighting Effects
I also have adjusted it until I've satisfy.
4. I've also applied "Len Flare" effect on the chair layer to make the chair look a bit more attractive.
"Filter" > "Render" > "Len Flare"
As you can see that, I've adjusted the effect on the second picture.
and I've applied it on the background too.
![](https://blogger.googleusercontent.com/img/b/R29vZ2xl/AVvXsEiBiwsdLajZ5P0H7Ux99B6A332sghN4dsOacm6noS2BmJauUZqGhLKARLziRGwSA0XpLEZHyIyjnaN57XUF1GeU3sFmPPrwh-B22b8CeoLnFFswjlaTVWFmGEMOEQIyvSK4jAazQpX2LZQv/s320/7-DOOGE+TOOL.jpg)
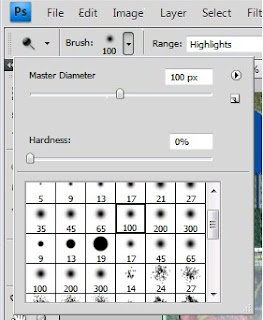
5. I've also used the "Dodge Tool" as shown the above on the others picture layer.
( *I've forgotten to printscreen on the picture layer*)
The purpose I applied this tool is to make the picture shining and brighter.
![](https://blogger.googleusercontent.com/img/b/R29vZ2xl/AVvXsEh6NrC86-fbVwOPhJAjiiPN7DsSnzM4U6F7K4d_QAi_2oNb-fTSuCS3prNSvyY6KQwSTYTNzQKRDfZ6nwiIYMpn5Spubl_swV7zLhpU8GsZGxYH_kDQ-VXkmT4HcmLJRNL2ZEDgDeTCer4Q/s320/7398329-graduate-student-in-cloak-with-open-arms-over-blue-sky-rear-view.jpg)
6. Next, I've chosen this picture to add inside my e-wallpaper.
7. Then, I've placed it near the chair layer.
![](https://blogger.googleusercontent.com/img/b/R29vZ2xl/AVvXsEgi4psrdnGlLLZhzxKSmbCf8QI7PTm3THgsRww-_Epv00eQH5RgBFvv3YGHXQgm9xzHQ5fyKbS_sZZO1mEbi3RxLv-INaT3facK5NgiZtt04wsqf91GMpS8-hZQhtDm2nHIFfe1I64H5cd8/s400/8-GRADUATE+STUDENT%2528B4%2529.jpg)
By the way, the pictures of the graduate student contain some white words and I don't want to see the white words on it.
![](https://blogger.googleusercontent.com/img/b/R29vZ2xl/AVvXsEhYtVxWkVIzTWeyKMFnploGh3xWlBlSGHPmiJdrrcdJXRl-vjjPF9_A9gQaMcZv9K5jDlAdjX3Z5nUQDrVVs34agIPDhOu_9keKQ6lXHTqkL77H8CvJRrHixeMMvDB_-XTte8vlQgbt5GAL/s320/clone+stamp+tool.jpg)
So, I used the "Clone Stamp Tool" to clone on the white words so that the white words will disappear.
![](https://blogger.googleusercontent.com/img/b/R29vZ2xl/AVvXsEhyVeHW8nX-SO5aw0ugDiOlzenNgUIg0HvzeuVJ8w9P_YGU905muQLPWzEeBYOr-hUHRzr77qglRVQu7HJvEgMEn0oEgXmI5SHS_tKm6yyICf2jYhhDlrTDePPGzH-KJ_QjmNOJ2ubdavOW/s400/8-GRADUATE+STUDENT%2528AFTER%2529.jpg)
Then, it will became like this after removing the white words.
![](https://blogger.googleusercontent.com/img/b/R29vZ2xl/AVvXsEgoIhTC4PjoYiOaSuBEy9kyC41f4RRgvcYqgGhxEKnTMWFK0zznQM1FXhO5y-tC_oYPWY-U2NTzuvnTzsEjMkw9enPxYRbNJAngkfK914XTrcjwhFigIAc5QbVizkn2mAF29RZ0f1yHBvRH/s400/9-+diffuse+glow.jpg)
![](https://blogger.googleusercontent.com/img/b/R29vZ2xl/AVvXsEhSO-VvgD0T_coNGu1BPQIE980hEVxoN2UxhWcqYipHXFUdAqN5PqElASLE-rDzhglcyrVMhknELZNF3EEAJIARICkTdmo302mJ7i9_YD0-15-YROPyhFN-p9_BqQLpqZ-sX0FDrAyHYCj7/s400/9-+diffuse+glow%2528result%2529.jpg)
8. Lastly, I've applied the "Diffuse Glow" on the background layer and some other layers too.
Filter > Distort > Diffuse Glow
I've applied this effect in order to make my background looks different, brighter, more attractive and nicer.
![](https://blogger.googleusercontent.com/img/b/R29vZ2xl/AVvXsEi_SYLLJojdBJsGlZuYopRYdaAfa2dcTgZ2Fa8l2sen6yvQRtzvCE2Fhfshily9HZqTZynsC9ydDK6HWYcf4qVPtkHyVqI393ilfEH0rugr0rhbFF81bCYvJn4du1rR6sLJPlLbjYMhQGYA/s400/E-WALLPAPER-RETOUCHING.jpg)
And this is the result after further edited.
^_^
I like to play around with adobe photoshop and explore it!
Adobe Photoshop was amazing!
No comments:
Post a Comment